
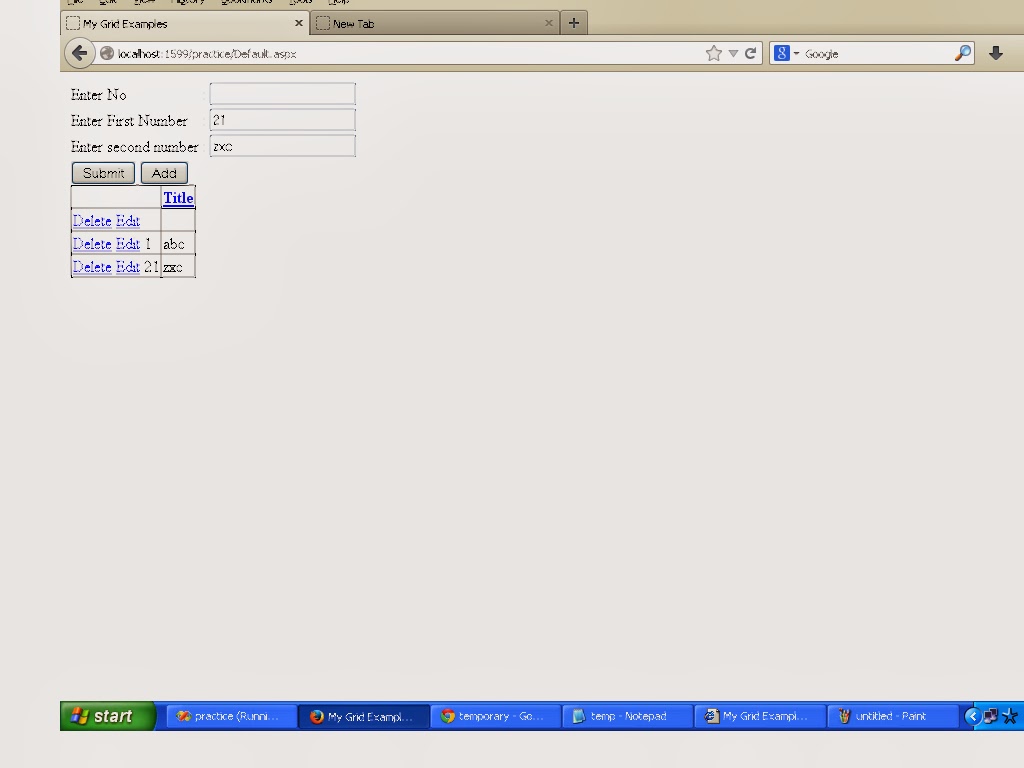
How to create temp table in code behind and bind with Gridview control in asp.net.
In this article i have shown and given code to edit or display only those value from grid to respective text box on which row user will click.if he had clicked on 3rd row then all the data from third row will come up and will display in respective control.
Steps-
1.Take viewstate to store first value as user will enter .
2.Take actual table (temporary table not linked with database no need any connection for this).
3.Take number of column as per requirement .
4.Take datarow to add column in to datatable.
------------------------------------------------------------------------------------------------
Now here is code to create temporary table.
private DataTable ProConnection()
{
//ClsBusinessConnection objBus = new ClsBusinessConnection();
//DataTable BindAllVal = objBus.DClsBusinessConnection();
//gridtodisplaytempData.DataSource = BindAllVal;
// gridtodisplaytempData.DataBind();
//above 4 line code need to bind gridview with database connectivity.
//but currently if you don't have database and you need to do some gridview functionality //then you can create temporary table.
DataTable temporarytableDt = new DataTable();
if (ViewState["NewFirstTable"] == null)
{ temporarytableDt.Columns.Add("Id");
temporarytableDt.Columns.Add("Name", typeof(String));}
else{
temporarytableDt = (DataTable)(ViewState["NewFirstTable"]);}
DataRow datarowvar = temporarytableDt.NewRow();
datarowvar["Id"] = TxtFirstVal .Text;
datarowvar["Name"] =TxtSecondVal .Text;
temporarytableDt.Rows.Add(datarowvar);
ViewState["NewFirstTable"] = temporarytableDt;
gridtodisplaytempData.DataSource = temporarytableDt;
gridtodisplaytempData.DataBind();
return temporarytableDt;
}
------------------------------------------------------------------------------------------
Now what i am goin to do is to take commandsource and NamingContainer so ,
i can get rowindex which has already edit and delete linkbutton,
to edit and delete the data from temporary table and bind to the grid again.
No Need to take two function for edit and delete just take rowcommand and use command name .
but for adding purpose we need to take add function because that is not inside the grid.
public void gridtodisplaytempData_Click(object sender , System .EventArgs e)
{
ProConnection();
}
->Dont forget to add edit event..
protected void gridtodisplaytempData_RowEditing(object sender, GridViewEditEventArgs e)
{}
protected void gridtodisplaytempData_RowCommand(object sender, GridViewCommandEventArgs e)
{
LinkButton lnkbtn = (LinkButton)e.CommandSource ;
GridViewRow row = (GridViewRow)lnkbtn.NamingContainer;
if (e.CommandName == "Edit")
{
TxtFirstVal.Text = ((Label)(row.FindControl("lblId"))).Text;
TxtSecondVal.Text = ((Label)(row.FindControl("lbltitle"))).Text;
}
else
{
DataTable dtnew = (DataTable)(ViewState["NewFirstTable"]);
dtnew.Rows.RemoveAt(row.RowIndex);
gridtodisplaytempData.DataSource = dtnew;
gridtodisplaytempData.DataBind();
}
}
now when you click edit link button ..
if (e.CommandName == "Edit")
{
TxtFirstVal.Text = ((Label)(row.FindControl("lblId"))).Text;
TxtSecondVal.Text = ((Label)(row.FindControl("lbltitle"))).Text;
}
this code will get execute and for delete ..
DataTable dtnew = (DataTable)(ViewState["NewFirstTable"]);
dtnew.Rows.RemoveAt(row.RowIndex);
gridtodisplaytempData.DataSource = dtnew;
gridtodisplaytempData.DataBind();
it will take directly rowindex and will romove that row from temporary table.
 --------------------------------------------------------------------------------
<div>
<table >
<tr><td>Enter Id:</td><td>:</td><td><asp:TextBox runat="server" ID="TxtFirstVal"></asp:TextBox> </td></tr>
<tr><td>Enter Name:</td><td>:</td><td><asp:TextBox runat="server" ID="TxtSecondVal"></asp:TextBox> </td></tr>
<tr>
<td colspan ="3">
<asp:Button runat="server" ID="btnSubmit" Text ="Submit"
onclick="btnSubmit_Click" />
<asp:Button runat="server" ID="btnAdd" Text ="Add" onclick="btnAdd_Click"/>
<asp:label runat ="server" ID="lblnum" ></asp:label>
<asp:GridView ID="gridtodisplaytempData" runat="server" AutoGenerateColumns ="false"
GridLines="Both" AllowSorting ="true" PageSize ="5"
onrowcreated="gridtodisplaytempData_RowCreated"
onrowediting="gridtodisplaytempData_RowEditing" >
<HeaderStyle/>
<Columns >
<asp:TemplateField ><ItemTemplate >
<asp:LinkButton runat="server" ID="lnkbtndel" Text ="Delete" CommandName ="Del"></asp:LinkButton>
<asp:LinkButton runat="server" ID="lnkbtn" Text ="Edit" CommandName ="Edit"></asp:LinkButton>
<asp:label runat="server" id="lblId" SortExpression ="dt" Text='<%#Eval("Id") %>' HeaderText ="ID"
HeaderStyle-CssClass ="CssClass"></asp:label> </ItemTemplate></asp:TemplateField>
<asp:TemplateField HeaderText ="Title" SortExpression ="UsrScrM_Title"><ItemTemplate >
<asp:label runat="server" id="lbltitle" Text='<%#Eval("Name") %>' HeaderText ="ID" HeaderStyle-CssClass
="CssClass"></asp:label> </ItemTemplate></asp:TemplateField>
</Columns>
</asp:GridView>
</td>
</tr>
<tr><td> </td> </tr>
</div>
In this article i have shown and given code to edit or display only those value from grid to respective text box on which row user will click.if he had clicked on 3rd row then all the data from third row will come up and will display in respective control.
Steps-
1.Take viewstate to store first value as user will enter .
2.Take actual table (temporary table not linked with database no need any connection for this).
3.Take number of column as per requirement .
4.Take datarow to add column in to datatable.
------------------------------------------------------------------------------------------------
Now here is code to create temporary table.
private DataTable ProConnection()
{
//ClsBusinessConnection objBus = new ClsBusinessConnection();
//DataTable BindAllVal = objBus.DClsBusinessConnection();
//gridtodisplaytempData.DataSource = BindAllVal;
// gridtodisplaytempData.DataBind();
//above 4 line code need to bind gridview with database connectivity.
//but currently if you don't have database and you need to do some gridview functionality //then you can create temporary table.
DataTable temporarytableDt = new DataTable();
if (ViewState["NewFirstTable"] == null)
{ temporarytableDt.Columns.Add("Id");
temporarytableDt.Columns.Add("Name", typeof(String));}
else{
temporarytableDt = (DataTable)(ViewState["NewFirstTable"]);}
DataRow datarowvar = temporarytableDt.NewRow();
datarowvar["Id"] = TxtFirstVal .Text;
datarowvar["Name"] =TxtSecondVal .Text;
temporarytableDt.Rows.Add(datarowvar);
ViewState["NewFirstTable"] = temporarytableDt;
gridtodisplaytempData.DataSource = temporarytableDt;
gridtodisplaytempData.DataBind();
return temporarytableDt;
}
------------------------------------------------------------------------------------------
Now what i am goin to do is to take commandsource and NamingContainer so ,
i can get rowindex which has already edit and delete linkbutton,
to edit and delete the data from temporary table and bind to the grid again.
No Need to take two function for edit and delete just take rowcommand and use command name .
but for adding purpose we need to take add function because that is not inside the grid.
public void gridtodisplaytempData_Click(object sender , System .EventArgs e)
{
ProConnection();
}
->Dont forget to add edit event..
protected void gridtodisplaytempData_RowEditing(object sender, GridViewEditEventArgs e)
{}
protected void gridtodisplaytempData_RowCommand(object sender, GridViewCommandEventArgs e)
{
LinkButton lnkbtn = (LinkButton)e.CommandSource ;
GridViewRow row = (GridViewRow)lnkbtn.NamingContainer;
if (e.CommandName == "Edit")
{
TxtFirstVal.Text = ((Label)(row.FindControl("lblId"))).Text;
TxtSecondVal.Text = ((Label)(row.FindControl("lbltitle"))).Text;
}
else
{
DataTable dtnew = (DataTable)(ViewState["NewFirstTable"]);
dtnew.Rows.RemoveAt(row.RowIndex);
gridtodisplaytempData.DataSource = dtnew;
gridtodisplaytempData.DataBind();
}
}
now when you click edit link button ..
if (e.CommandName == "Edit")
{
TxtFirstVal.Text = ((Label)(row.FindControl("lblId"))).Text;
TxtSecondVal.Text = ((Label)(row.FindControl("lbltitle"))).Text;
}
this code will get execute and for delete ..
DataTable dtnew = (DataTable)(ViewState["NewFirstTable"]);
dtnew.Rows.RemoveAt(row.RowIndex);
gridtodisplaytempData.DataSource = dtnew;
gridtodisplaytempData.DataBind();
it will take directly rowindex and will romove that row from temporary table.
<div>
<table >
<tr><td>Enter Id:</td><td>:</td><td><asp:TextBox runat="server" ID="TxtFirstVal"></asp:TextBox> </td></tr>
<tr><td>Enter Name:</td><td>:</td><td><asp:TextBox runat="server" ID="TxtSecondVal"></asp:TextBox> </td></tr>
<tr>
<td colspan ="3">
<asp:Button runat="server" ID="btnSubmit" Text ="Submit"
onclick="btnSubmit_Click" />
<asp:Button runat="server" ID="btnAdd" Text ="Add" onclick="btnAdd_Click"/>
<asp:label runat ="server" ID="lblnum" ></asp:label>
<asp:GridView ID="gridtodisplaytempData" runat="server" AutoGenerateColumns ="false"
GridLines="Both" AllowSorting ="true" PageSize ="5"
onrowcreated="gridtodisplaytempData_RowCreated"
onrowediting="gridtodisplaytempData_RowEditing" >
<HeaderStyle/>
<Columns >
<asp:TemplateField ><ItemTemplate >
<asp:LinkButton runat="server" ID="lnkbtndel" Text ="Delete" CommandName ="Del"></asp:LinkButton>
<asp:LinkButton runat="server" ID="lnkbtn" Text ="Edit" CommandName ="Edit"></asp:LinkButton>
<asp:label runat="server" id="lblId" SortExpression ="dt" Text='<%#Eval("Id") %>' HeaderText ="ID"
HeaderStyle-CssClass ="CssClass"></asp:label> </ItemTemplate></asp:TemplateField>
<asp:TemplateField HeaderText ="Title" SortExpression ="UsrScrM_Title"><ItemTemplate >
<asp:label runat="server" id="lbltitle" Text='<%#Eval("Name") %>' HeaderText ="ID" HeaderStyle-CssClass
="CssClass"></asp:label> </ItemTemplate></asp:TemplateField>
</Columns>
</asp:GridView>
</td>
</tr>
<tr><td> </td> </tr>
</div>


0 comments: